Create a Bridge from Railway to AWS RDS with Tailscale
How can you privately send traffic from Railway to RDS?
In this tutorial, you will set up a Tailscale bridge to AWS RDS. This creates a secure tunnel between your Railway services and your AWS RDS database instances. This allows you to connect to your RDS databases privately without exposing traffic to the public internet.
Objectives
In this tutorial, you will:
- Deploy a Tailscale subnet router EC2 instance
- Set up split DNS for domain resolution
- Verify and test connectivity to your RDS instance
- Route traffic from Railway to RDS using Railtail
This tutorial is in depth, so if it's your first time using Tailscale or setting up a bridge to your RDS instance, every detail is covered!
Prerequisites
-
You will need an AWS IAM access key or IAM Role to stand up resources with Terraform or OpenTofu.
NOTE: While you can just put these secrets in a
~/.awsfolder or aterraform.tfvarsfile, it's a good practice to avoid putting secrets on disk unencrypted. If you have 1Password, you can use 1Password Secret References so that your secrets are never stored permanently on disk. This is especially important to prevent AI tools from reading your keys and as an extra layer of protection from committing secrets to your git repositories. -
You will need to generate a new ssh key that can be used to provision the AWS Instance.
-
You will need a Tailscale account and have Tailscale installed on your local machine. The free tier is generous and sufficient for this tutorial.
-
You will need to generate, store, and reference a Tailscale Auth Key
Generate a Tailscale auth key
- Head over to the Keys page located within the settings menu on the Tailscale dashboard.
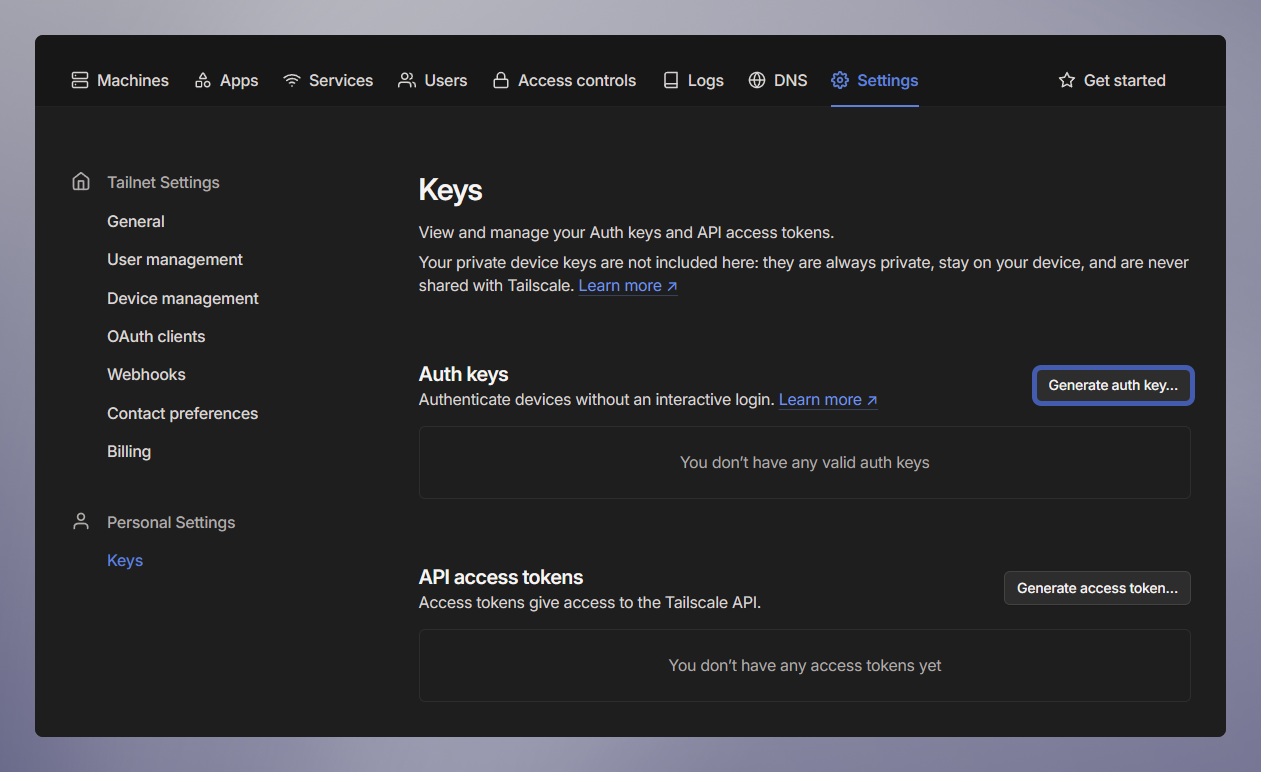
-
Click Generate auth key.
Put in a description like "AWS RDS Subnet Router" and leave all other settings as the default.
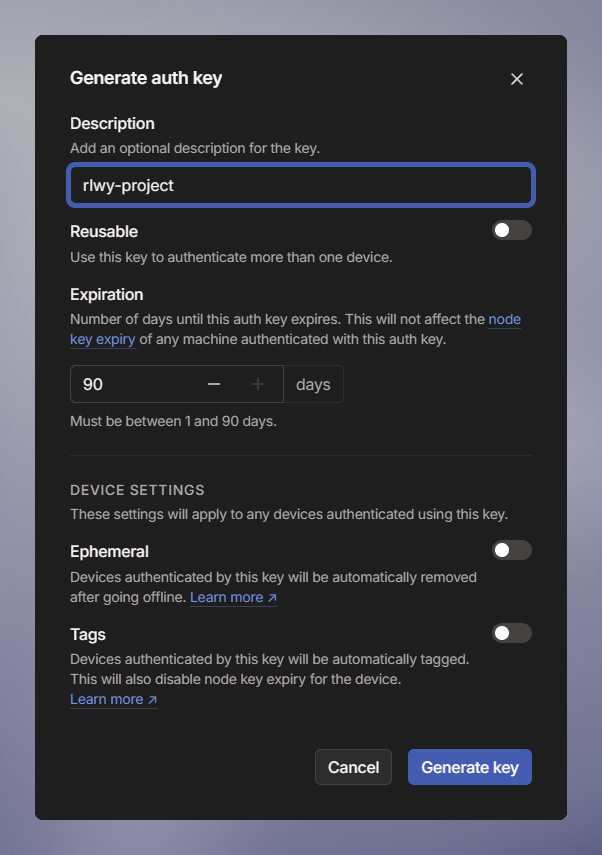
-
Click Generate key.
Tailscale will now show you the newly generated auth key. Be sure to copy it down, and store it in secret store (like 1Password).
-
Click Done.
Git clone the example project
There is an example project built in Terraform (or OpenTofu if you prefer) to stand up all the AWS resources you'll need to test out connectivity to RDS.
Create terraform.tfvars
Create a terraform.tfvars file to store your variables:
!IMPORTANT: Make sure you update your userlist.txt password to the same password as your new rds_password.
Deploy
Initialize and apply the Terraform configuration:
Review the changes and type yes to confirm deployment.
When the deployment completes, you'll see outputs including instructions for configuring split DNS and how to run the test script to verify your deployment.
Configure split DNS in Tailscale
Split DNS allows Tailscale to resolve AWS RDS domain names using AWS DNS servers, which is required for RDS connectivity.
- Go to the Tailscale Admin Console DNS settings
- Click Add Nameserver → Choose Custom
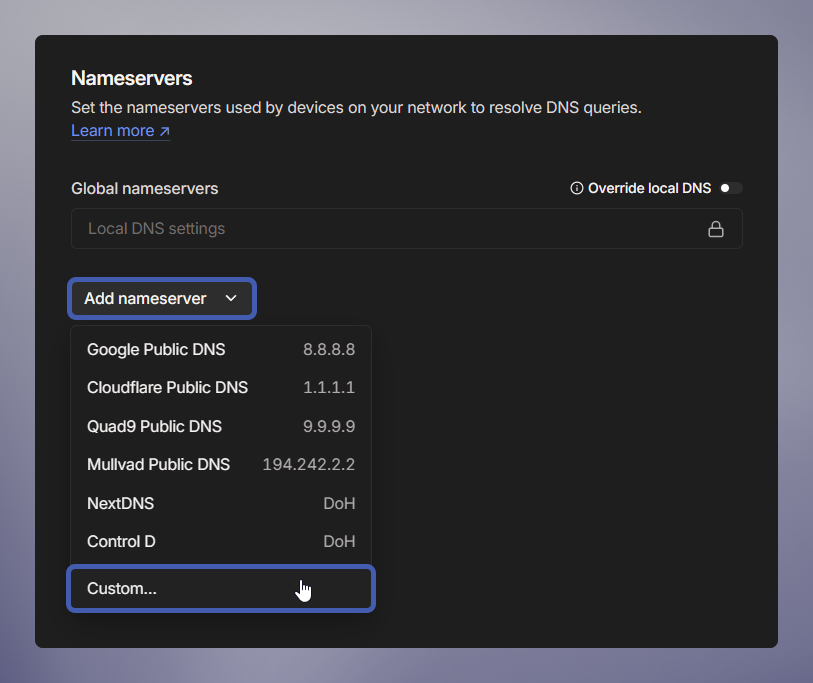
- Enter the VPC DNS server IP:
172.16.0.2(VPC CIDR base + 2) - Enable Restrict to domains
- Enter:
us-west-2.rds.amazonaws.com(replaceus-west-2with your AWS region)
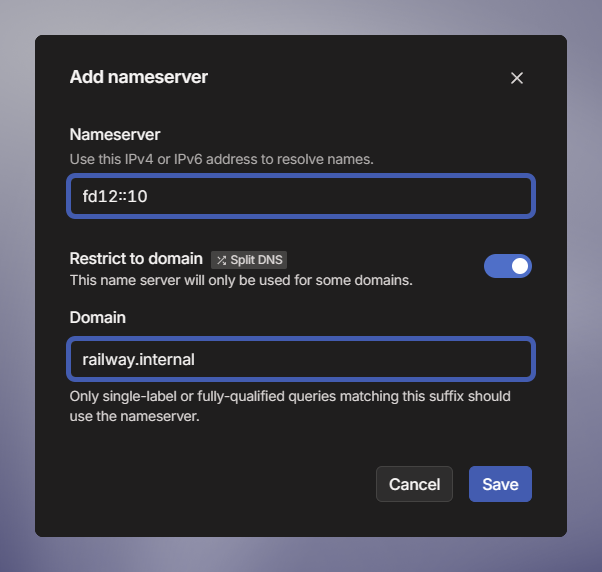
- Click Save
Approve advertised subnet routes and/or enable route acceptance on your devices
For devices you can't install Tailscale on, you need to approve the routes in the Tailscale admin UI.
- You will see a
Subnets !badge on the machine you set up. This indicates it is advertising routes but hasn't been approved. - Click the
...next to the machine - Click the checkbox and click save.
- Now the
!will be removed from theSubnetsbadge, indicating that the advertised routes are approved.
For your local devices to access the subnet routes advertised by the subnet router, you can also enable route acceptance via the CLI:
Verify connectivity
Run the verification script:
The endpoint and other details can be found in the Terraform outputs after deployment.
If you're running into issues at this point, head down to the Troubleshooting section to help figure out what might be wrong.
Connect to your RDS instance
Once the verification passes, you can connect to your RDS instance directly from your local machine using standard PostgreSQL tools or any database client:
If you've never used Tailscale before, take a moment to familiarize yourself with the tailscale CLI and wrap your head around what's happening here. This is fantastic! You're routing traffic privately to your RDS instance from your local machine!
Similarly, you can now use this subnet router to route traffic from other devices in your Tailnet, including as a way to create a bridge between networks. Now you're ready to connect your Railway services! Let's do that next.
Deploy railtail into your project
Railtail is a project that will forward SOCK5 traffic to RDS, because right now Railway containers don't allow privilege escalation. This way you can use private IPv6 networking to Railtail and forward your traffic privately to your AWS Subnet Router, which will then route to RDS.
- In a project where you want to bridge services privately to RDS, click the Create button in the upper right corner. Then select Template -> Type in RailTail.
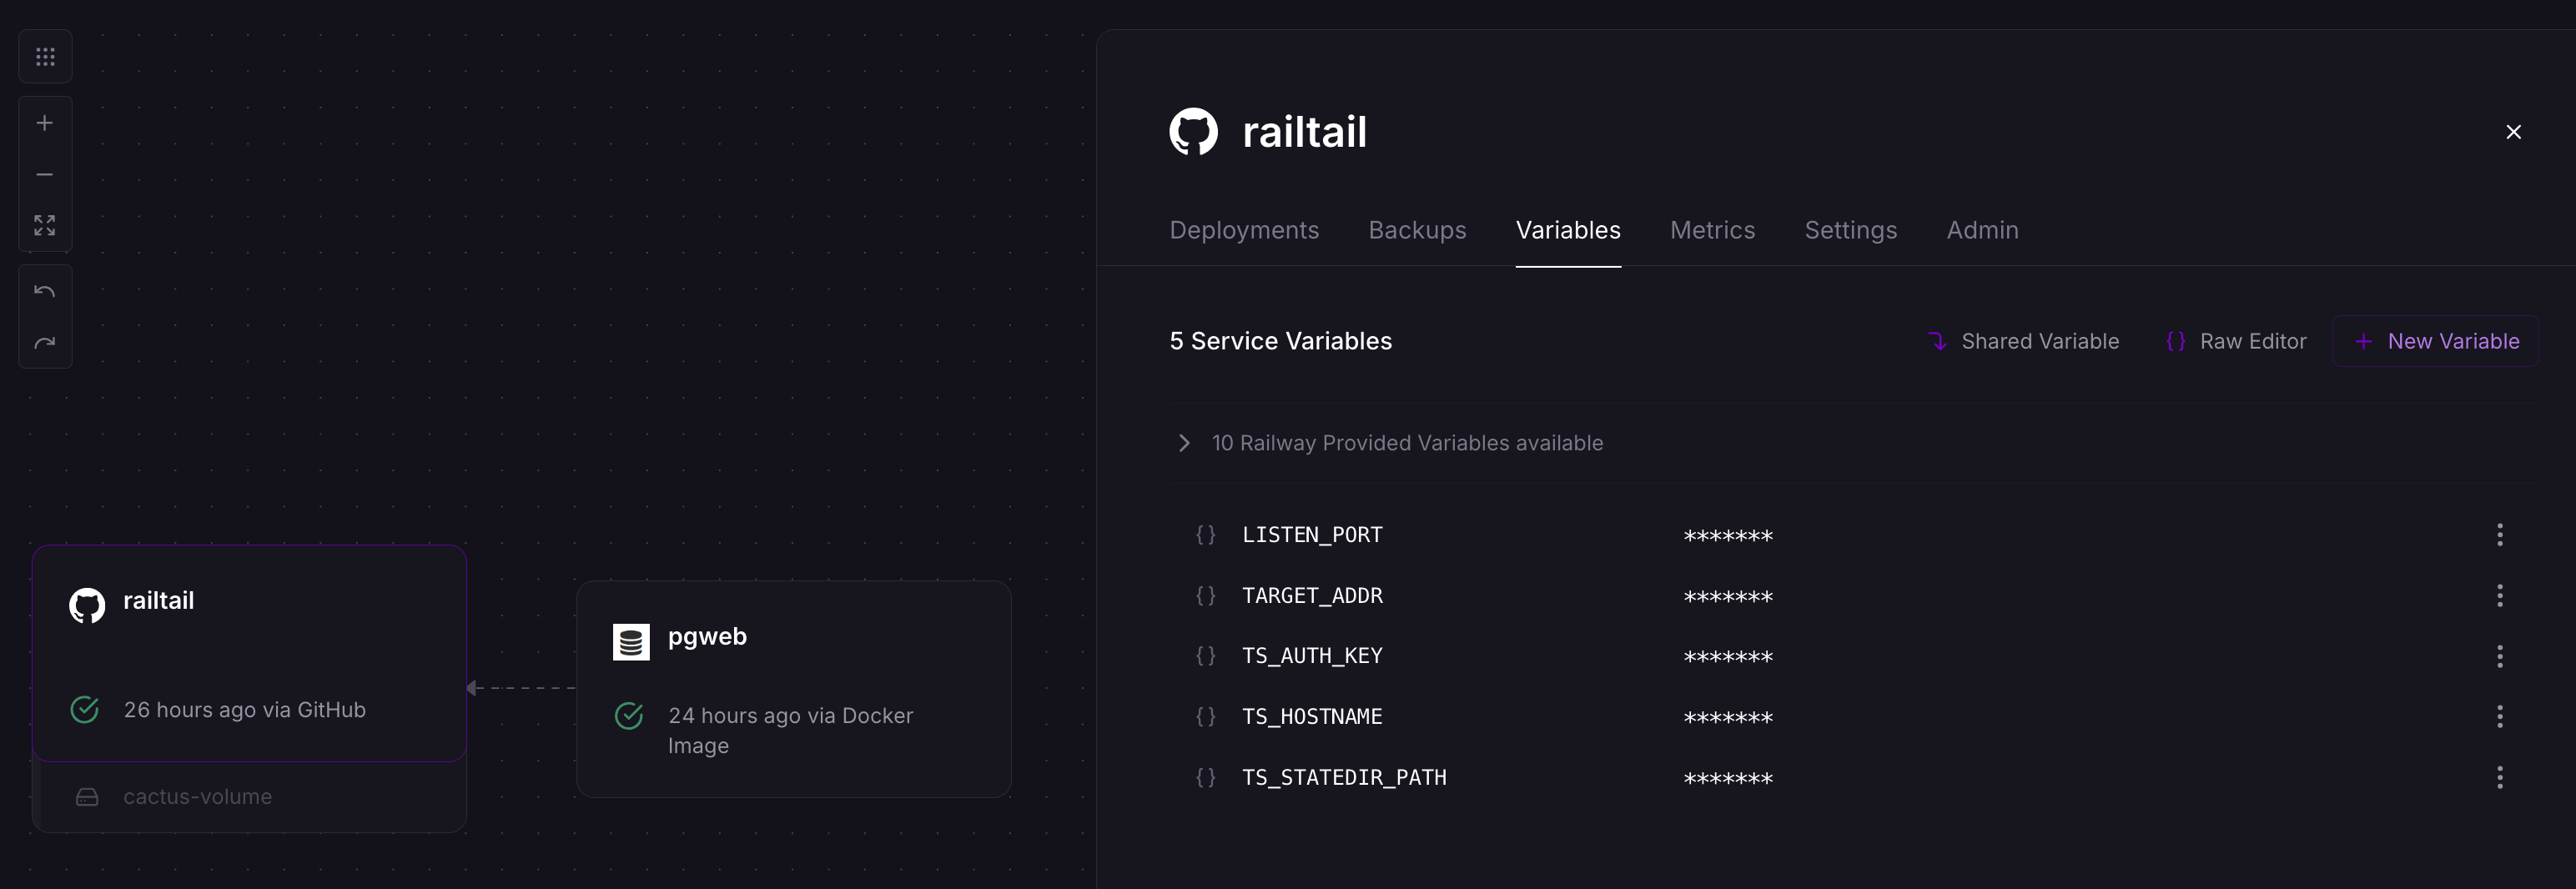
You will need four variables to deploy Railtail and start bridging traffic to your RDS instance:
- LISTEN_PORT: This is the port that Railtail listens on to forward traffic. We like
41641, which is Tailscale's default UDP port for making peer-to-peer connections. - TARGET_ADDR: The target address that Railtail will forward traffic to. In this case it should be
tailscale-test-db.<subnet>.<region>.rds.amazonaws.com. You can grab this from the output of the terraform run you did earlier, or in the AWS console. - TS_AUTH_KEY: The tailscale auth key you set up earlier. In the format:
tskey-auth-0123456789 - TS_HOSTNAME: The friendly DNS name you can reference in your Tailnet. You can name this whatever you want.
railtailorrailtail-project-nameis a good name here.
Click Deploy Template.
Bridge traffic to RDS
Now you can connect any service to your RDS backend. Add a variable to your connecting Service like: DATABASE_URL="postgresql://USERNAME:PASSWORD@${{railtail.RAILWAY_PRIVATE_DOMAIN}}:${{railtail.LISTEN_PORT}}/postgres"
That's it! Now you're bridging traffic privately from Railway to RDS.
Cleanup
When you're done with the tutorial, and so that AWS doesn't charge you money while your instances sit idle, you can destroy the resources you created automatically with:
Troubleshooting
If you encounter issues with connectivity check the verify_tailscale_routing script included with the repository. You may be encountering:
- DNS Resolution:
- Verify split DNS configuration in Tailscale.
- Check that the correct AWS DNS server IP is being used.
- Route Acceptance:
- Ensure subnet routes are being advertised by the subnet router and that you've approve those routes in the Tailscale Admin Console.
- Verify your client is accepting routes with
tailscale status.
- Database Connection Failures:
- Check security group rules to ensure the subnet router can access RDS.
- Confirm you're using the correct credentials. (!IMPORTANT
manage_master_user_password = falsemust be set or else the RDS module will ignore using your set password)
- Subnet Router Issues:
- Check that IP forwarding on is enabled with
cat /proc/sys/net/ipv4/ip_forward. - Verify Tailscale is running with
sudo systemctl status tailscaled.