Set up a Tailscale Subnet Router
What is a subnet router?
A subnet router is a device within your tailnet that you use as a gateway that advertises routes for other devices that you want to connect to your tailnet without installing the Tailscale client.
Source: Subnet routers Via Tailscale's Documentation
In the context of Railway, The "other devices" are the services within a project.
About this tutorial
This tutorial will help you connect to your database via the private network without you having to use public endpoints.
Since Railway doesn't currently offer a native way to access the private network from your local environment, you can use a Tailscale Subnet Router to accomplish this.
Deploying Tailscale as a subnet router into your project means that you can access the railway.internal private domains from any device connected to your tailnet.
This tutorial aims to provide a simple step-by-step guide on setting up everything needed so that you can access the private domains of your services.
Objectives
In this tutorial, you'll learn how to do the following: -
- Generate an Auth Key.
- Set up split DNS.
- Deploy the Tailscale Subnet Router template.
- Approve the private network subnet.
- (Bonus) Connect to Postgres locally via the private domain.
Prerequisites
This guide assumes you are familiar with the concepts of Private Network, for a quick explainer check out the guide and reference page.
In Railway -
-
Have all the services you plan on connecting to via the tailnet, listening on
::(all interfaces).This is necessary because the Tailscale tunnel will communicate with your services over Railway's private network.
All database services already do this but for information on configuring your service to listen on
::, see here.
In Tailscale -
-
Have an account.
You can sign up here - For what this template achieves you do not need a paid plan.
-
Have the Tailscale app installed on your computer.
You can find the downloads for your OS here.
1. Getting an auth key
The Auth key will authenticate the Tailscale machine that you'll deploy into your Railway project in a later step.
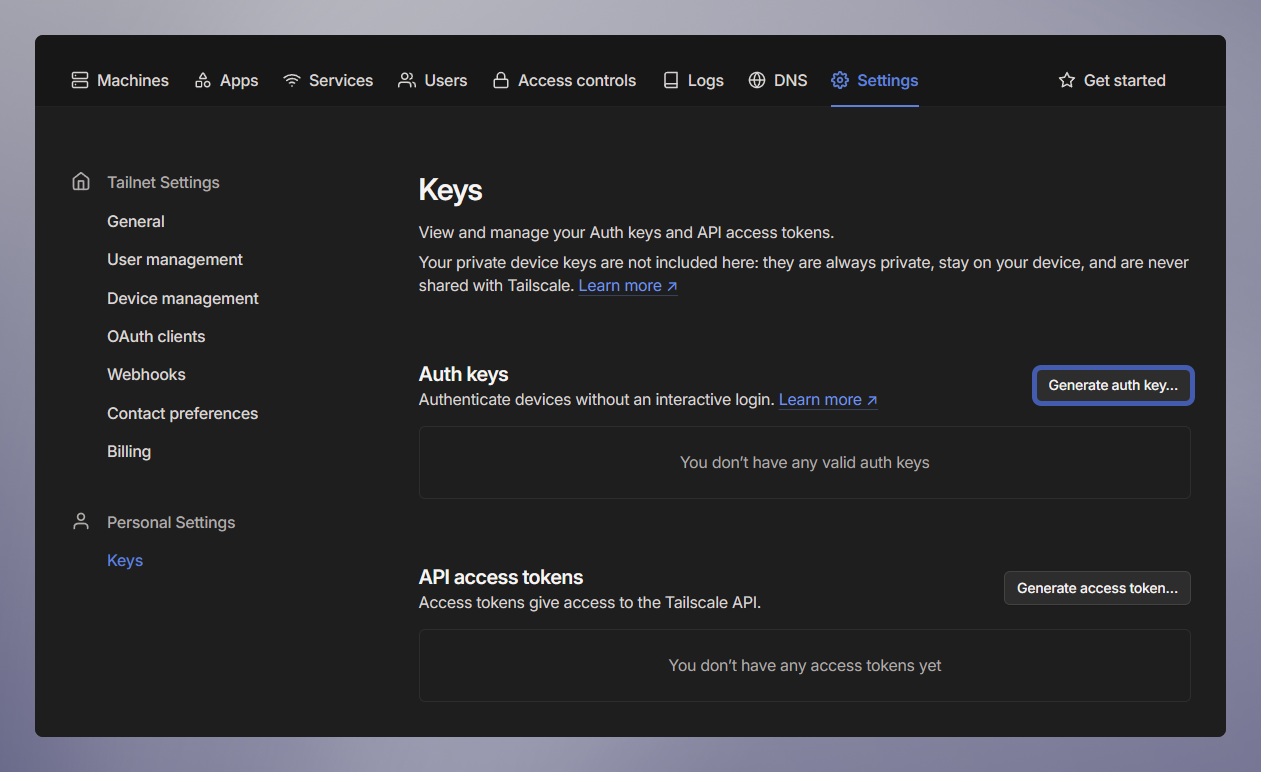
- Head over to the Keys page located within the settings menu on the Tailscale dashboard.
-
Click Generate auth key.
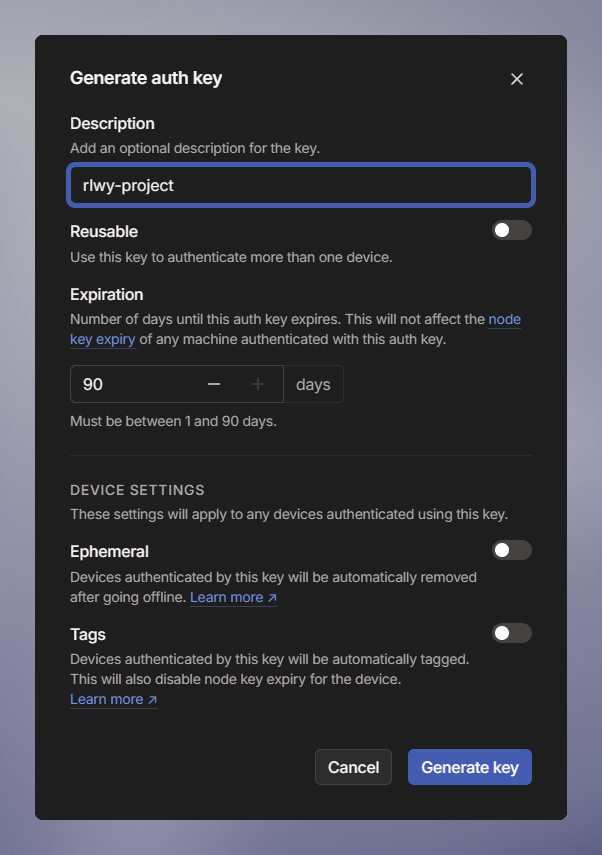
Put in a description and leave all other settings as the default.
-
Click Generate key.
Tailscale will now show you the newly generated auth key, be sure to copy it down.
-
Click Done.
2. Configure split DNS
Properly configuring the nameserver in Tailscale is essential for enabling local DNS lookups for your private domains.
-
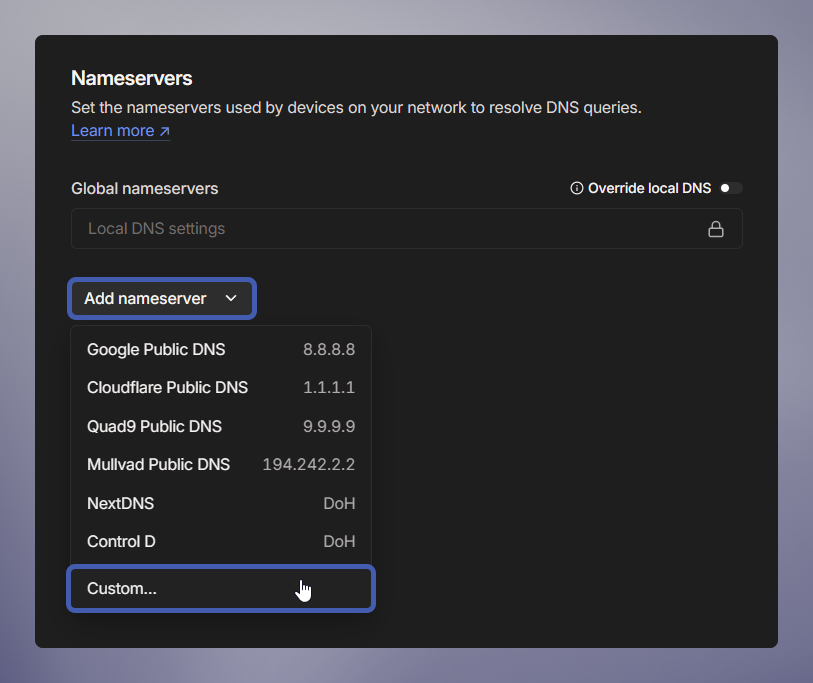
Open the DNS page.
-
Under the Nameservers Header, click Add Nameserver → Click Custom.
This is where you'll tell Tailscale how to route the DNS lookups for your
railway.internaldomains.
-
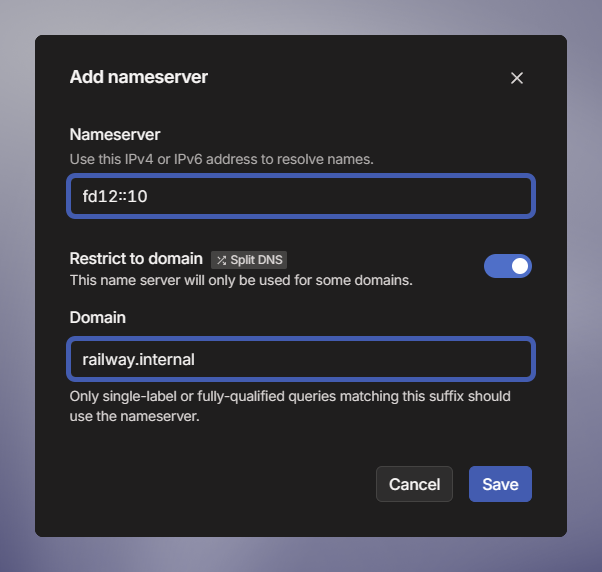
Enter
fd12::10as the Nameserver.This DNS nameserver is used across all private networks in every environment and will handle your DNS queries for private domains.
-
Enable the Restrict to domain option, AKA Split DNS.
-
Enter in
railway.internalas the domain.This makes sure only DNS lookups for your private domain are forwarded to the private DNS resolver.
- Click Save.
3. Deploy the Tailscale subnet router
This will be the gateway into your environment's private network.
-
Open the project that contains the services you want to access privately.
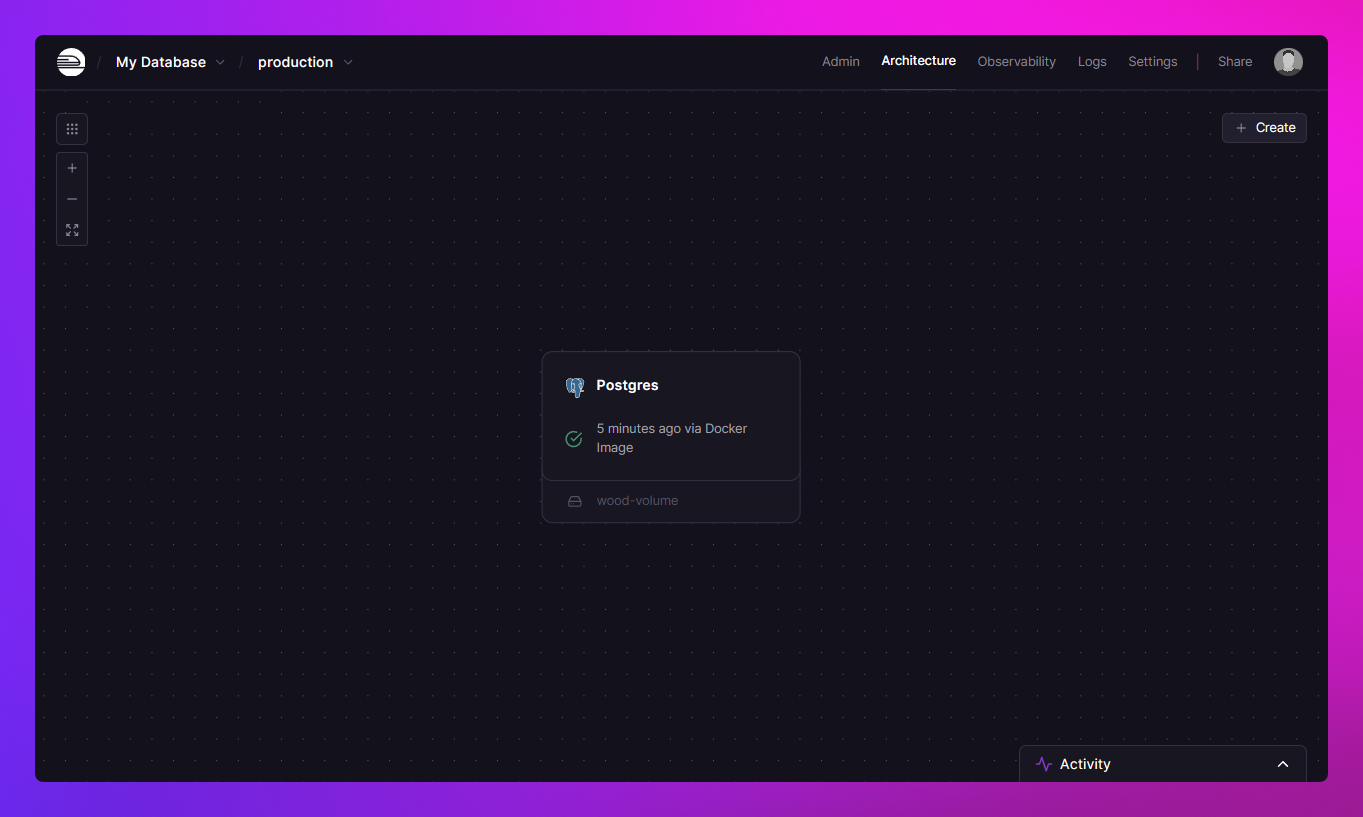
For this tutorial, you will deploy the Subnet Router into a project with a Postgres database service.
-
In the top right of the project canvas, click Create → Choose Template.
-
Search for the Tailscale Subnet Router template.
Choose the result that is published by Railway Templates.

- A ghost service will appear, Paste in your Auth Key from earlier.
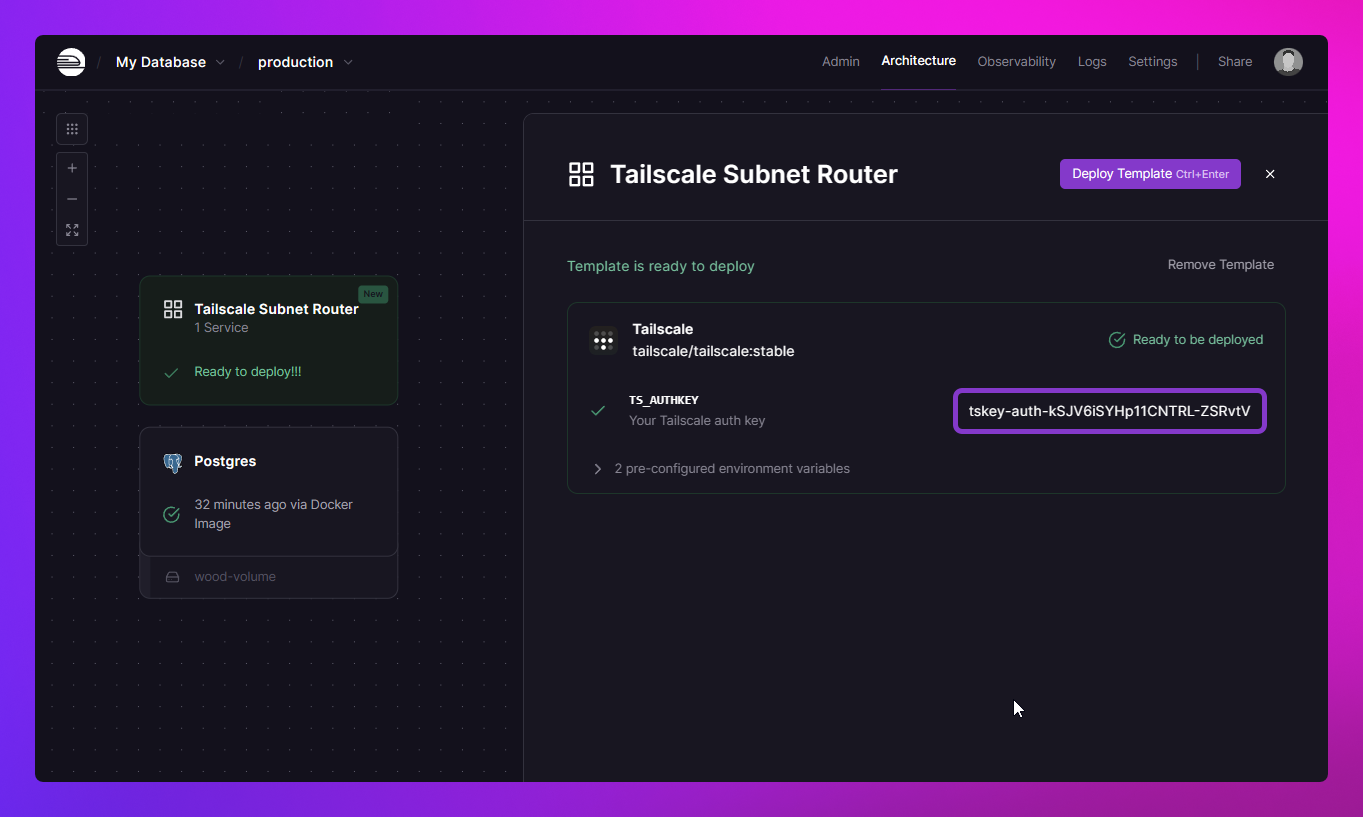
- Click Deploy Template
This template will start to deploy and once deployed it will register itself as a machine in your tailnet with the name automatically derived from the project's name and environment name.
4. Approve the subnet
Your subnet router will advertise the private network's CIDR range but you will need to manually approve it.
- Head back over to the Machines dashboard.
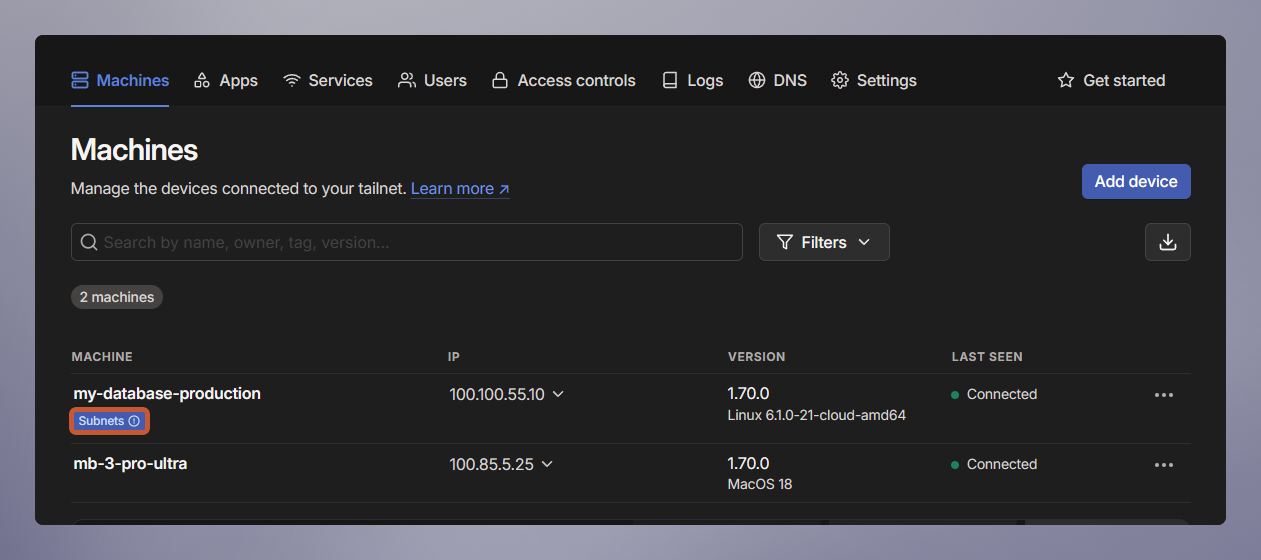
You will see your newly deployed machine with its name that was previously derived from the project and environment.
- Click on the machine's 3-dot menu → Edit route settings.
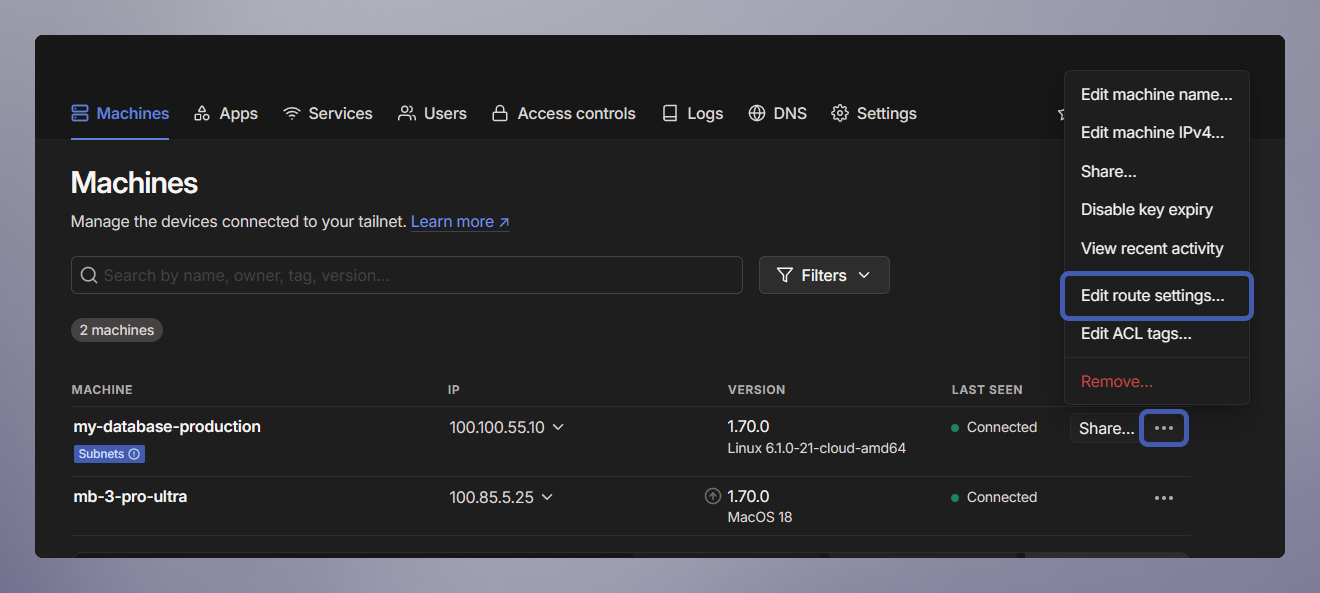
- Click the radio button on the
fd12::/16to accept it.
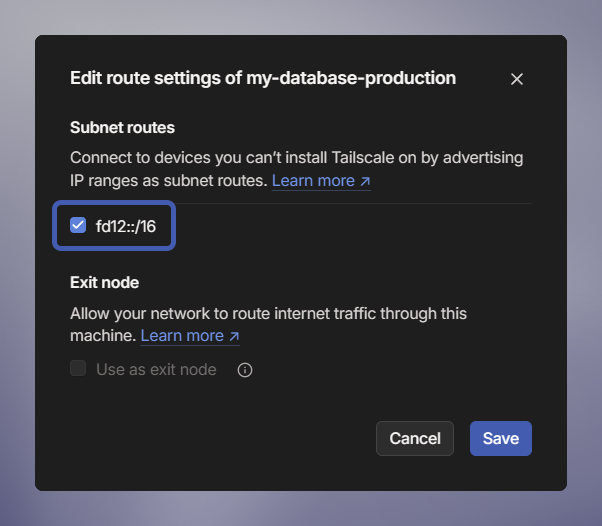
This route covers the entire private networking range allowing you to access all services within the project.
-
Click Save.
-
Ensure that the Use Tailscale subnets option is enabled in your Tailscale client's Settings or Preferences menu.
That is it for all the configurations needed, you can now call any service via its private domain and port just as if you were another service within the private network!
5. Connecting to a service on the private network (bonus)
This tutorial has used Postgres as an example service, so let's finally connect to it via its private domain and port!
You can use any database GUI tool you prefer, or none at all, since your setup allows you to connect to the database over the private network using any software.
Example: Your prisma migrate deploy or python manage.py migrate commands will now work locally without the need to use the public host and port for the database.
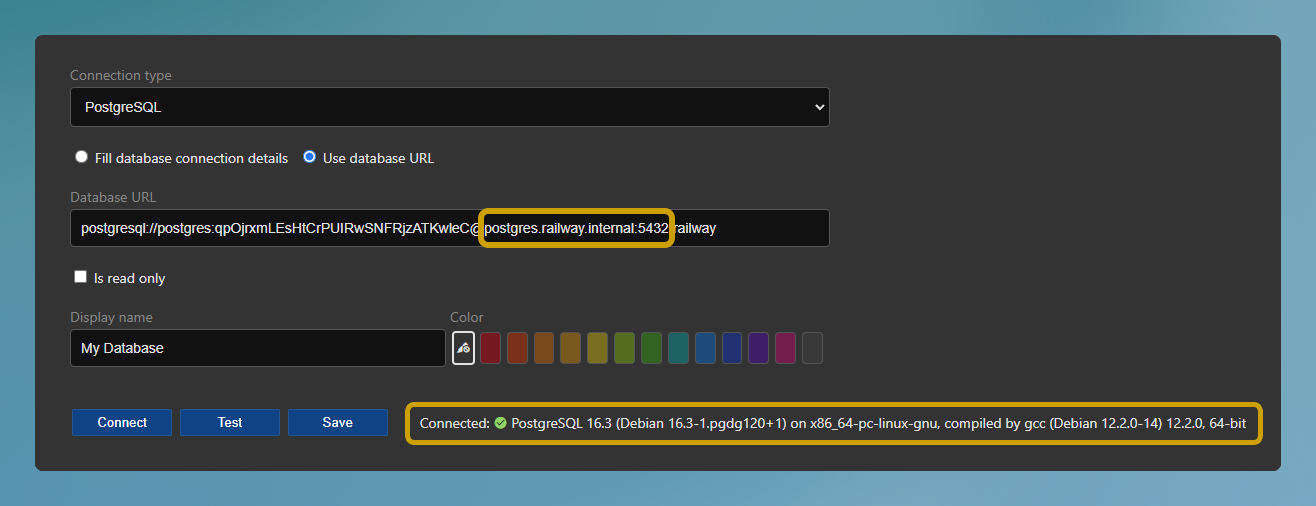
Note the use of the private domain and port in the database URL.
Additional Resources
This tutorial explains how to set up a Tailscale Subnet router on Railway but does not delve into all the terminology and settings related to Tailscale.
We recommend reviewing the following Tailscale documentation: